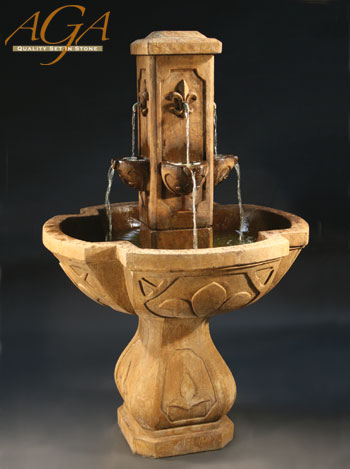
3710 80" THREE TIER PETAL LEAF FOUNTAIN Shown in Finish #94 Carnelian Mountain Three Tier Weight: 1039 Dimensions: H79.5"W53"BD20"
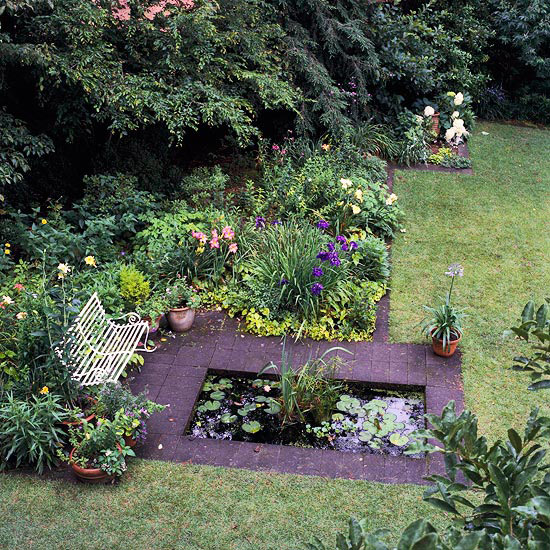
"Garden fountains range in size and style from palatial to small, quirky units made from flower pots. The landscaping style around your fountain should remain consistent with the fountain style. Regardless of size and style, fountains are meant to be focal points in the garden, so the landscaping design should highlight rather than upstage the fountain. As a general rule, the fountain should always be taller than the surrounding plants, so you must pay attention to mature plant sizes when choosing the plants for your fountain landscape design. 1.) Measure the total fountain height, including any pedestals, then mark a circle with landscaping spray paint with a diameter two to three times the fountain height. Remove the sod layer with a sod cutter and spade, spray the soil with a pre-emergent herbicide, then fill in the circle with pea gravel. Plant a low hedge around the perimeter of the circle, using a short evergreen species, such as elegans boxwood (Buxus sempervirens "Elegantissima"). 
The landscaping features around a fountain should highlight the formal or casual appearance of the fountain.
2.) Fill in a circle that has a diameter two to three times the fountain height with pea gravel. Place four curved, concrete benches in the circle spaced evenly around the fountain and halfway between the fountain and edge of the circle; this landscaping design enhances a formal fountain and requires very little maintenance. 3.) Install a small garden pond beside the fountain to carry the water theme from the fountain to ground level. Surround the fountain and pond with your choice of plants, arranging them in order of descending height so you can clearly see all the plants. 4.) Excavate the soil to a depth of 6 inches around the fountain, pack down 2 inches of gravel and top with 2 inches of level sand. Lay brick pavers over the sand foundation and fill in the cracks with sand to create a patio that highlights the fountain. Substitute used bricks or cobblestones to take the patio from formal to rustic. 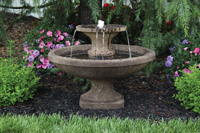
3861 23" TWO TIER BELLA FOUNTAIN Shown in Finish #99 Burro Brown Stone Two Tier White LED Light Included Weight: 157 Dimensions: H23"W30.25"L24.25"
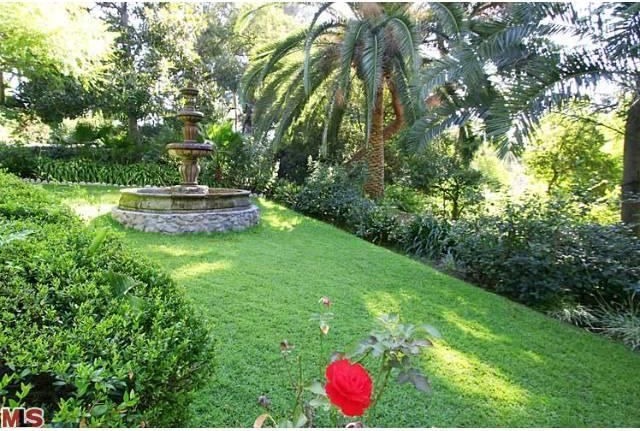
5.) Place the fountain in the middle of your lawn and add four separate walkways leading to the path from different directions in your garden. You can simply place flagstones or stepping stones for a casual walkway, remove the sod layer and fill in the path with gravel or install formal brick paver walkways. 6.) Plant a hedge around the fountain that is 2 to 4 feet tall and about 5 feet out from the fountain. Plant a ring of small flowers another 2 feet out from the hedge plants; plant the same species around the hedge, but alternate colors, if desired. Fill in the empty space with a 2- to- 3-inch layer of shredded bark mulch to conceal the soil, prevent erosion and aid in moisture retention. 7.) Build a raised planter about 3 feet tall from concrete pavers, fill the planter with soil and place the fountain in the center. Use the soil around the fountain to plant seasonal annuals; simply pull out the old flowers at the end of the blooming period and replace with new seasonal annuals. 
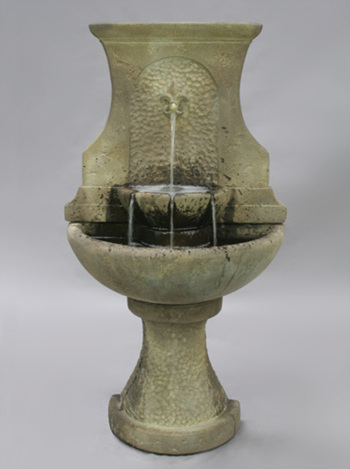
3714 57" GRANDESSA ARCH WALL FOUNTAIN Shown in Finish #94 Carnelian Mountain Wall Fountain Weight: 1274 Dimensions: H57"W60.25"L32"
8.) Plant sweet alyssum (Lobularia maritima) or "Blue Cascade" lobelia (Lobelia erinus "Blue Cascade") densely around the base of a fountain that is set inside a raised bed planter. The sweet alyssum resembles churning water or bubbles around the fountain, while "Blue Cascade" gently cascades down the raised planter and looks like a living extension of the water fountain. 9.) Place large and medium rocks in the ground around the fountain; bury the lower one-third of each rock so they appear as natural features in your garden. Plant small flowers in the open spaces around the rocks or use the large boulders as the backdrop for group plantings. Fill in the empty space with shredded bark mulch or pea gravel mulch. 10.) Plant two or three medium shrubs, such as gardenia (Gardenia spp.), in an arc on opposite sides of the fountain, with each shrub arc covering approximately one-fourth of circumference around the fountain. Plant small flowers on the outside of the medium shrubs. Place three or four flagstones to create a path to the fountain on the two sides between the shrub arcs. Plant wildflowers such as California poppies in a flower bed around the fountain; this simple landscaping design is low-maintenance and coordinates well with rustic fountains, such as a simple fountain made from a watering can or flower pot. Tip
Reference:
Mahoney, Jessica, and Demand Media. "Home Guides." Home Guides. Http://homeguides.sfgate.com, n.d. Web. 13 Mar. 2014. <http://homeguides.sfgate.com/landscape-around-garden-fountain-49580.html>.
0 Comments
"There are many benefits to installing garden water fountains in your yard or garden area. Some of them are as simple as the soothing sound of water, but others are as important as providing an area for pollinating birds to bathe themselves. There is even the very real justification that it can increase the value of your home while improving the attractiveness of the yard. With either the sound of a rushing waterfall or a light patter of rain, the sound of water has always been useful in helping people relax. There are even meditation exercises that require the subject to imagine a still pond of water with a slow drip hitting. Having a fountain in the yard can provide the relaxation benefits of the sound of running water. The second benefit of having garden water fountains is that they provide bathing for many types of birds. People think that having a bird bath is enough. However, the fact is that most bird baths are a single container with standing water. The water must be changed on a regular basis or it can start to grow many types of bacteria and fungus. This can cause the water to smell and be more of a distraction than a pleasure. Additionally, the stagnant water can actually harm the birds, causing disease and forcing the birds to find a new place to bathe. Having a fountain is a great benefit to the wildlife in your yard. Birds will appreciate the running water and will bathe with more frequency and for longer periods. This will allow you time to view the birds and enjoy their presence. It is also great for flowering plants, because the birds will pollinate the plants while in the garden. This can cause flowering plants to produce more flowers over a longer period of time. Finally, having garden water fountain can increase in the value of your home. Water fountains add a peaceful sound to the garden and can even provide decorative accents to your home. Fountains can be constructed out of a variety of materials to complement the look of the home. Copper fountains, with their gradual patina of green, provide a European flair to the garden. A fiberglass fountain can be tinted to look like aged granite, providing a slightly medieval flair to an otherwise modern garden setting". Image Reference:
"CelebrityGardens." Zillow. Zillow.com, n.d. Web. 12 Mar. 2014. <http://www.zillow.com/digs/celebrity-gardens/>. Content Reference: Admin. "Benefits of Installing Water Garden Fountains." Beckett Pumps. Beckettpumps.com, 18 Jan. 2013. Web. 12 Mar. 2014. <http://www.beckettpumps.com/index.php/2013/01/18/benefits-of-installing-water-garden-fountains/>. "About this time last year, my little pond was overcome with a mossy, weedy growth. After doing some research, I discovered that it was string algae. Yuck! Not only does it look terrible, algae buildup in a pond is bad because it can take over the pond quickly and eventually starve your fish and plants of oxygen and nutrients. String algae is a common problem in garden ponds and there is a ton of information on the internet about it. 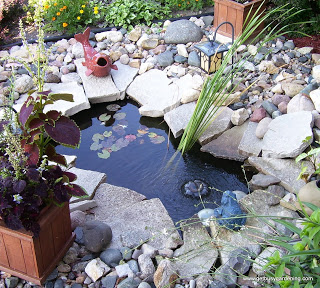
Image Credit
I was nervous when first started reading about algae growth in garden ponds. I was worried that I would have to use a chemical that might kill my fish and plants… and possibly even have to start over from scratch with my pond. But it turns out there is a natural solution to keeping pond water clear and getting rid of algae. 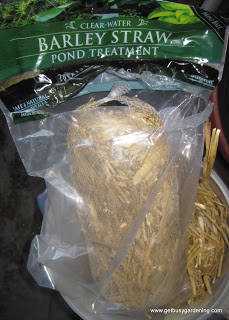
Barley Straw
It sounds strange, but the answer is barley straw. Not only is it natural, it won’t harm your fish or plants and it’s cheap. In fact, I’ve read that barley straw works better than chemicals do! Win, win, win, win! You can find highly technical explanations for why barley straw works on the internet. But basically, as the barley straw decomposes it releases something similar to hydrogen peroxide (H2O2) which will eventually choke out the algae. 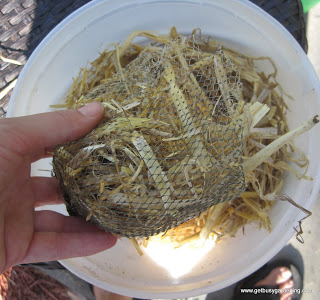
Stuffing barley straw into mesh holderYou can buy barley straw at your local nursery or on the internet. When I bought mine, it came packed in small bales that were much too large for my pond (pictured above). So I made a smaller bundles out of the mesh packaging the bales came in when I bought them. 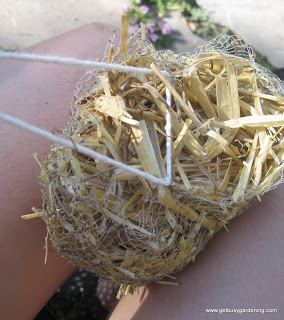
Making Barley Straw Bundle
I used string to tie the opening in the mesh closed. It’s recommended you put your barley straw bundle near a fountain or waterfall where the water will flow through it. It takes a few weeks for the barley straw to start to decompose, so it will take a little longer to get results than it would with chemicals. If you want to start seeing results faster, there are a few steps you can take now. 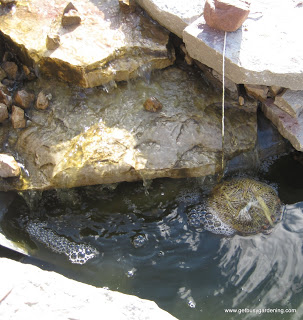
Barley straw bundle at bottom of waterfall (in my back pond) Start by removing as much of the algae as you can manually. A toilet brush works great for grabbing the string algae and scrubbing the sides of the pond. 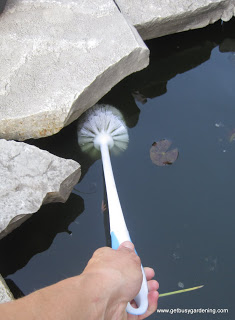
Toilet brush used for cleaning pond
Ideally, you would buy a new toilet brush to use specifically for your pond. (what would be more disgusting – using a previously used toilet brush in your pond, or using your pond brush in your toilet!?) 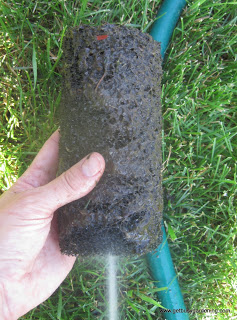
Rinsing Pond Filter
If you have a filter in your pond, rinsing it daily during this time will also help to remove the algae. As a second step, you could add hydrogen peroxide to your pond water. I don’t know if there’s a special formula of H2O2 per gallon of water, so I recommend doing some research for your size of pond. My small pond is 90 gallons, and I added 1/2 cup of H2O2. Pour the H2O2 over a fountain or waterfall to disperse it. Shortly after adding the H2O2 and barley straw to my pond, I started to see results. In no time, my pond water was crystal clear, and it stayed that way all summer. Now I put in a new barley straw bundle in both of my ponds in the spring to avoid algae growth and keep the pond water clean. Once the barley straw starts to decompose, the bundle will sink so it’s no longer visible on top of the water. It’s nice to be able to watch my fish swimming around and feeding". Reference:
"Get Busy Gardening." Get Busy Gardening. Getbusygardening.com, n.d. Web. 11 Mar. 2014. <http://getbusygardening.com/2011/06/keeping-pond-water-clear-natural-way.html>.
"Natural surroundings and lush greenery helps provide a serene atmosphere, even in the midst of noisy cities and towns. That is reason why interior decorators and designers are increasing advising on the beautification of your home and surroundings with plants, shrubs and fountains. Water fountains provide an atmosphere of serenity and calmness to your mind and soul as you hear the water gurgling down the fountain. It relieves you from the tension and anxieties of your everyday life and makes your home feel like heaven. One thing that must be kept in mind while installing a water fountain in your home is that, the fountain, be it a tabletop, a wall or a garden fountain, must be chosen and carved in a tasteful manner so that it blends with its surroundings. So, if you want to choose a fountain for your garden, you need not always get a big one just because you have a large garden. You can plan for a smaller model or even two small fountains installed at the right places circled with flowers and shrubs that give your garden a lovely appeal. Here are a few tips on which fountains to choose from according to your need and space available in your home or outdoors –
Reference:"Best Fountains for Your Home Décor : Know The Right Choice." Water Fountains and Relaxation RSS. Serenityhealth.com, n.d. Web. 10 Mar. 2014. <http://www.serenityhealth.com/articleseries.php?article_id=76>.
Your Bakana Options
Reference:
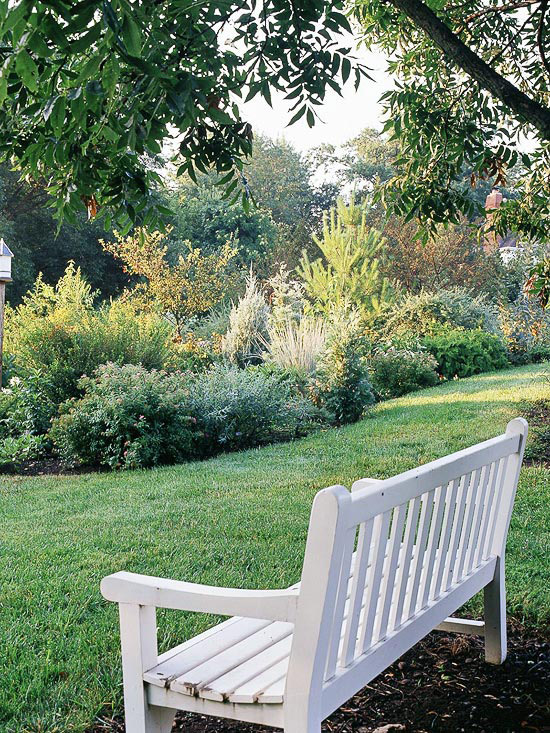
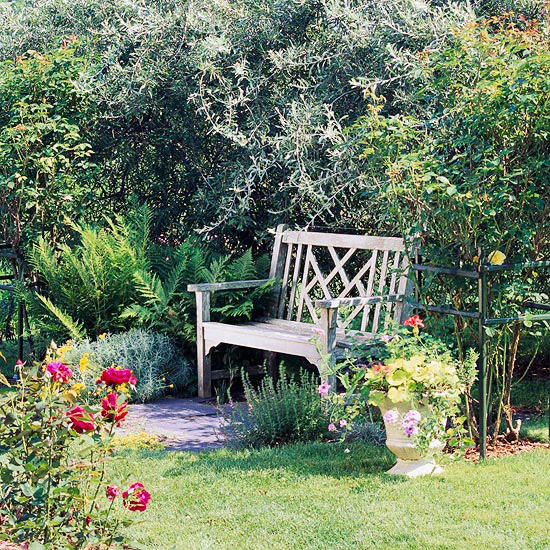
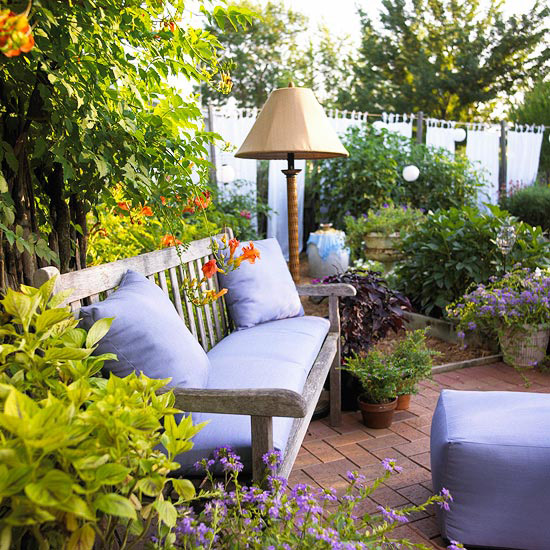
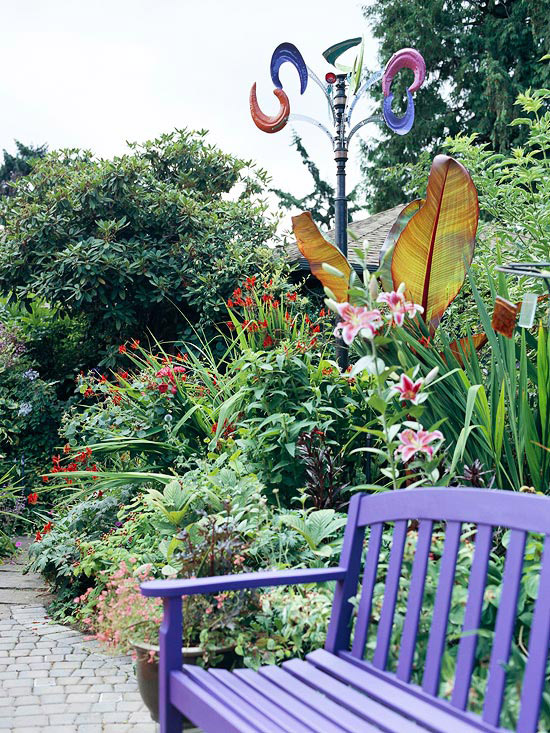
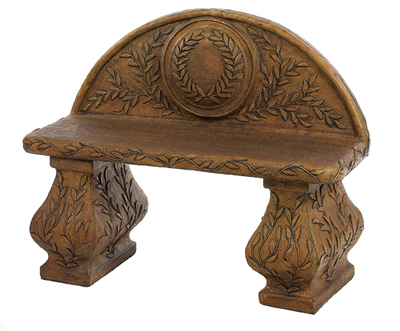
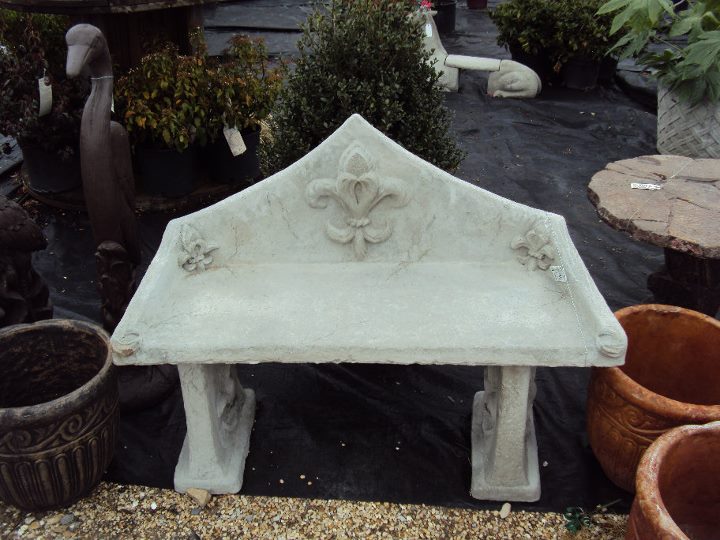
"The Many Moods of Garden Benches." Better Homes & Gardens. Bhg.com, n.d. Web. 07 Mar. 2014. <http://www.bhg.com/gardening/design/styles/the-many-moods-of-garden-benches/#page=1>. 
"A beautiful outdoor fountain can make a great focal piece for any garden or patio. Through proper care and good cleaning, your garden fountain can run smoothly through the test of time. There are several types of outdoor fountains to choose from depending on your personal taste, the size of your patio or garden area and how much time and maintenance you are willing to invest. Outdoor Fountain Care 101 Keeping your outdoor fountain clean is just as important as maintaining the proper water level. Routinely wiping the inner bowl of your outdoor fountain with a non-abrasive cloth not only keeps it looking shiny and beautiful, but also prevents the build-up of dirt and dust. Additionally, it is vital to remember to refill and clean your outdoor fountain pump on a regular basis as a dry pump will most likely result in the purchase of a new one. Cleaning your Garden Fountain Cleaning the bowl and pump is essential to the life of your garden fountain. The bowl should be emptied and lightly scrubbed with a toothbrush and dish detergent every one to three months. Before beginning your outdoor fountain cleaning, be sure and consult your manual in case your garden fountain requires a special cleaning method. For some garden fountains, algae additives and filtered water are needed to break down the build up of mold and calcium. Outdoor Fountain Pump Maintenance Before removing the pump, consult the manufacturer’s guide on proper cleaning and detaching methods. Once the pump is removed and opened, place it in a solution of vinegar for an easy-clean solution. Preventing the Growth of Algae Along with replacing the water on a monthly basis, you can also purchase an algae cleaner to decrease the growth of algae and keep the outdoor fountain’s water fresh. In addition, it is important to remember that algae, much like all growing organisms, experience increased growth when placed in well-lit areas. If algae continues to be a problem for you, you might want to consider moving your garden fountain to a shady area. Appropriate Water Levels for Your Garden Fountain As mentioned earlier, water levels are key to maintaining a healthy pump. The water level of your outdoor fountains should be checked daily, with small amounts of water added at each interval. Each month, you should drain and re-fill your outdoor fountain with fresh water to prevent stagnant water. Additionally, dry summer months can cause the water in your outdoor fountain’s bowl to evaporate more quickly, so be sure and check the water levels more frequently. Let it Snow: Winter Outdoor Fountain Care In seasonal climates and severe winter regions, outdoor fountains should be transported indoors to prevent cracking and freezing, especially marble garden fountains. Should removing the garden fountain from the outdoors prove to be too great of an undertaking, drain the outdoor fountain completely, dry it with a non-abrasive cloth and place a garden fountain cover over it as a protective shield from the weather". 
Reference:
"Tips for Year-Round Outdoor Fountain Maintenance." Improvements Blog. Improvementscatalogblog.com, 15 Oct. 2012. Web. 06 Mar. 2014. <http://www.improvementscatalog.com/RoomForImprovements/tips-for-year-round-outdoor-fountain-maintenance/>. 
#6044 16" HARVEST BRANCH PLANTER Weight: 40 Dimensions: H16.5"TD14.25"BD8.75"
Overview The shamrock is an indoor plant, often associated with Ireland and good luck. The leaves are like three-leaf clovers with delicate white or light purple blossoms. It is grown from bulbs.Your plant will require a rest period during the year, when it is allowed to go dormant. Choose a time that the leaves start to look a bit limp and stop watering it. As the leaves turn brown, clip them off. Place your shamrock in a cool, dry dimly lit room for one to three months. Bring it back out into a well-lit location, but not full sun, water it and feed it with a general-purpose houseplant fertilizer. Re-pot your plant at this time if it appears to be crowded in its current pot or if you want to divide it. Step 1 Choose a new plant container for your shamrock plant. It should be 2 to 4 inches wider than the original pot and 2 to 4 inches deeper. Step 2 Scatter stones or broken pottery pieces over the bottom of the container. Pour in 2 to 3 inches of commercial potting soil. This soil will add nutrients to your shamrock's roots, and it is guaranteed to be disease and weed-seed free. Step 3 Turn the plant upside-down, while holding onto the base of the plant, and tap on the bottom of the pot. The plant should slide right out, but if it doesn't push through the bottom of the drain hole with your fingers. Step 4 Place the root ball of the plant into the new container. The top of the original soil should set about an inch below the top of the new pot. If it is too low or too high, adjust the soil beneath it. Step 5 Pour additional soil around the root ball, pressing gently with your fingers to remove any air pockets and to stabilize the plant. You are finished when the added soil is even with the top of the original potted soil. Step 6 Water your shamrock with enough water until it comes out the bottom drainage hole. Set it in it's original spot. Reference:
Ellis, Karen. "How to Repot a Shamrock Plant." GardenGuides. Gardenguides.com, n.d. Web. 05 Mar. 2014. <http://www.gardenguides.com/100033-repot-shamrock-plant.html>.
"Not only is it raining on their parade, but it's darn cold, too. Mardi Gras revelers in New Orleans — accustomed to balmy weather for their big annual celebration — spent Tuesday bundled up under their costumes as the mercury hovered in the high 30s. "I've got my long johns on," Carol LeBlanc, who was dressed up as a scarecrow, told The Associated Press from the chilly, wet parade route. At 2 p.m. local time, New Orleans was registering at 39 degrees. That's just shy of the coldest "Fat Tuesday" daily high ever recorded — 38 degrees in Feb. 14, 1899, according to the National Weather Service. In contrast, the warmest Mardi Gras on record was Feb. 20, 1917, when temperatures climbed to 83 degrees. The average is around 67 degrees. "It's cold for Mardi Gras," said Mike Shields, a senior forecaster with the National Weather Service, adding that it was particularly cool considering how late Mardi Gras falls this year. Mardi Gras is the final day of the Carnival season and is on a different date each year, falling the day before Ash Wednesday, the first day of Lent. Members of the Mondo Kayo Social and Marching Club parade down St. Charles Avenue on Mardi Gras Day in New Orleans. There have only been four other Mardi Gras that fell on March 4, and their average high was 64.8 degrees. No more than a trace of rain has ever fallen on a March 4 Mardi Gras, but the wettest Mardi Gras ever was 2.12 inches of rain on March 1, 1927. The cold that New Orleans revelers are experiencing is part of the bitter temperatures that have enveloped the country this winter, Shields said. "It's just been a continuation of these cold air masses coming down into the eastern part of the country. This is just the latest one," he said. "The whole cold spell that the eastern part of the country has right now is affecting the South." New Orleans, which typically sees an average high of 69 degrees this time of year, won't be shivering for long: Tomorrow is forecast to warm up to 60 degrees. And the cold and gray didn't stop merrymakers from having fun. Tens of thousands were still expected to gather in the city's French Quarter". Reference:
Chuck, Elizabeth. "New Orleans Shivers in One of Coldest Mardi Gras Ever." NBC News. NBCNew.com, 04 Mar. 2014. Web. 04 Mar. 2014. <http://www.nbcnews.com/news/us-news/new-orleans-shivers-one-coldest-mardi-gras-ever-n44176>. 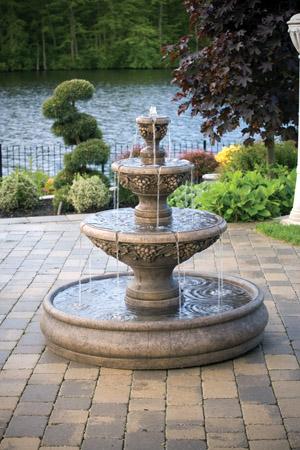
#3577 THREE TIER SONOMA POOL FOUNTAIN Shown In #73 Classic Iron Three Tier Weight: 698 Dimensions: H45.75"BD48"
"Garden fountains can be a great way to add a sense of peace and quiet to the backyard. Nothing can prevent a garden fountain from performing this function more than tilting or falling over. Rather than relaxing, you'll find yourself worrying about children playing near the fountain or messing with replacing broken fountains that have tipped over and broken. Save yourself the trouble and worry by leveling the fountain right the first time. You'll need a few basic tools and the job will be over quicker than you might think. Things You'll Need
Instructions
Reference:
Roberts, Joshua. "How to Level a Garden Fountain." EHow. Demand Media, 18 Dec. 2009. Web. 03 Mar. 2014. <http://www.ehow.com/how_5747908_level-garden-fountain.html>. |
AuthorArchives
January 2016
Categories
All
|


 RSS Feed
© 2016 Bakana Gardens & Gifts. All rights reserved.
Prices are subject to change without notice. Bakana Gardens & Gifts reserves the right to void and/or alter orders and prices in response to circumstances beyond our control. |
Driving Directions
|